The day before the pre-wedding shoot:
+ Get your eyebrows professional trimmed (if you are unable to do it yourself)
+ Slap on a mask before heading to bed // Moisturise as much as you can.
+ Apply a generous amount of lip balm too.
On the morning of:
Step 1: Start with a clean and moisturised face, then apply lip balm and make-up base.
Step 2: Use liquid foundation or cream foundation for stronger coverage.
Step 3: Apply concealer only on areas that need the extra coverage like blemishes, dark and/or red spots. You don’t want to have a caked-up face.
Step 4: If you don’t have bronzer or a darker foundation shade, you can always use brown eyeshadow for shading. Apply it around the corners of your face – near the hair line, the sides of your nose (for a sharpening illusion) and the jaw areas (for a slimming illusion). Once satisfied, set with loose/pressed powder.
Step 5: Using an eye primer to help your eye shadow last longer. For this tutorial, I used pink as the base colour and bronze to overlap it.
Step 6: Apply white eyeshadow just at the edge of your eyebrow bone. Highlighting your brow bone will help define your brows, and give your eyes a fresh and widening effect.
Step 7: Time to draw your eyebrows! Don’t stand too close to the mirror while doing it, you’ll need to see your entire face to ensure it’s balanced out.
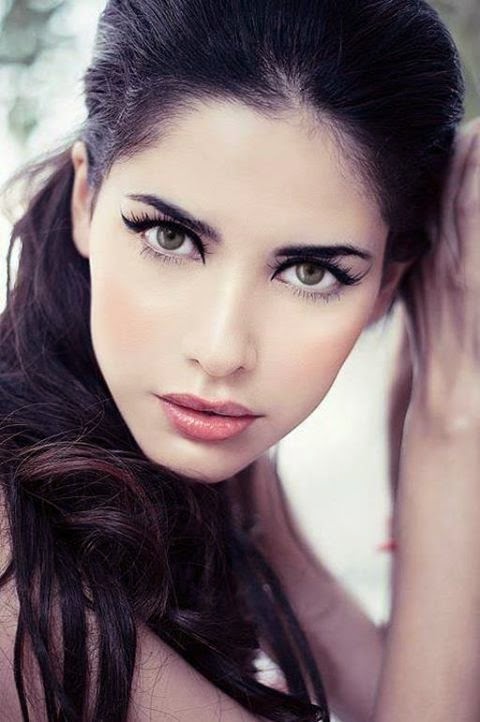
For the eyes, I used gel liner before a layer of liquid liner to help create a bold, longer-lasting flick. I wouldn’t recommend water lining; instead line as close as you can, from the top – you don’t want it to start smudging as the shoot (and heat) wears on.
Step 8: If falsies are necessary, I’d recommend those half sets that flare out into a longer end – mostly for comfort and easy application. It’ll also complement your lined eyes.
Step 9: Apply a shimmer stick to help pick up the light in photographs, enhancing the nose and cheekbones for that quintessential bridal glow.
Step 10: For a softer, delicate feel, use gold//silver shimmer for the under lines and brown//pink to finish it the other half.
Step 11: Apply a generous amount of blusher. You’ll need it, especially while taking outdoor shots because a natural amount will not translate in the pictures. Use a lip brush for precision, while applying lip colour.
Choose pink for a softer romantic look …
Or red for a classic chic look!
Alright now, off you go! Work it, you blushing bride, you!
To find a professional Make-up artist for your Wedding in Dublin | Galway | Cork | Limerick
check out http://callofbeauty.ie